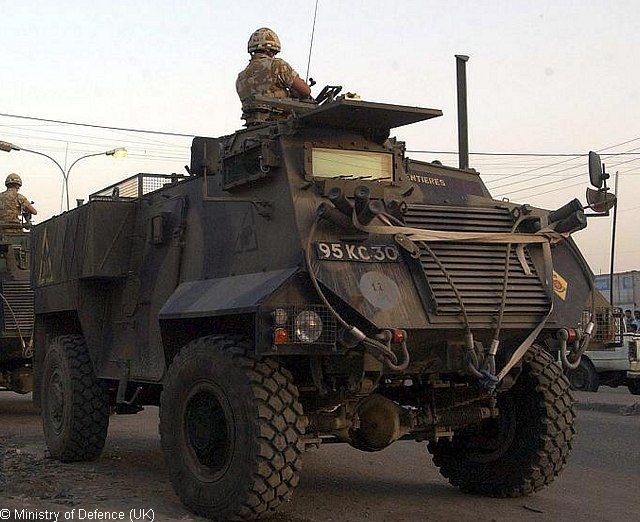
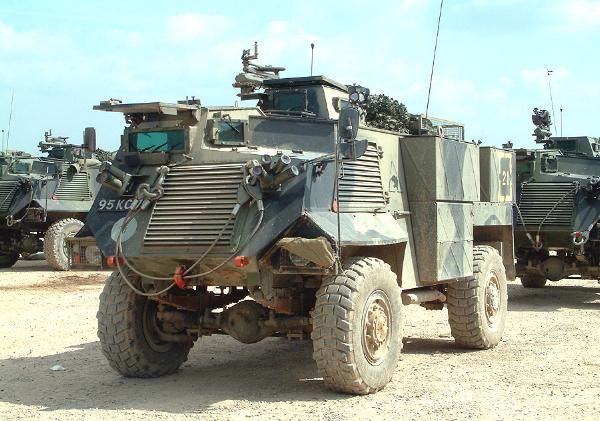
The AT 105 Saxon entered service with the British Army in 1984 with the first Battalions worth of vehicles equipping 1 Kings Own Royal Border Regiment. Delivery was complete by 1989 with 19, 24 Brigades being equipped with the vehicles. 24 Brigade surrendered a number of theirs when they became Airmobile in 1988 though retained one Battalion. The Saxon carried a GPMG on an air defence mount and later was adopted to mount the Peak GPMG turret from the FV432 although this modification was carried out for Kosova so getting late for Cold War Games. Saxon APCs were used for:
- The Infantry Battalions: Initialy Rifle companies but later included Milan and Morters
- RA Tac parties, this is an assumption but it would be very unusual for RA Tac parties not to have the same transport as the supported infantry units as this would mark them out as a target.
- REME repair and Recovery
- Command Post Vehicles for Air Defence Batteries including: Rapier, Javalin and Starstreak batteries.
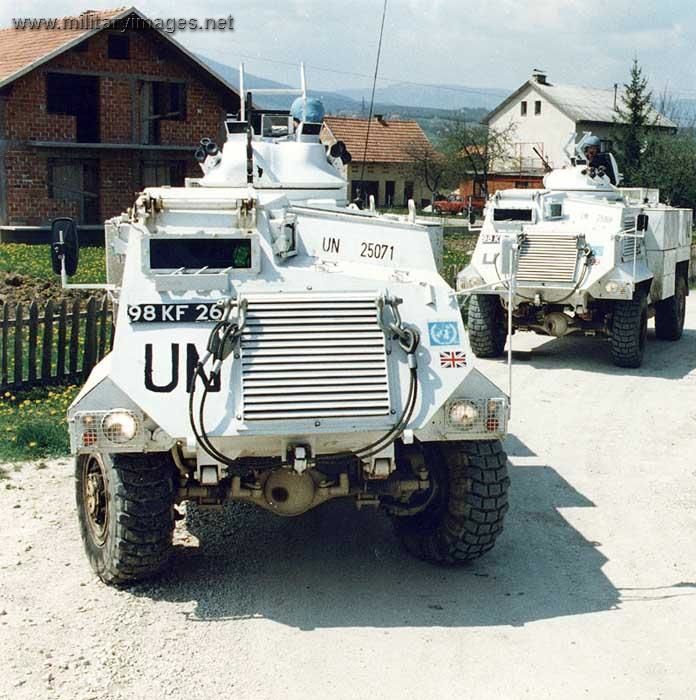
- Northern Ireland Patrol, I believe these were part of a follow on order let in 1990 for a further 100 vehicles.
- Northern Ireland Public Order Variants, these included a range of modifications to support their use in RIOT control.
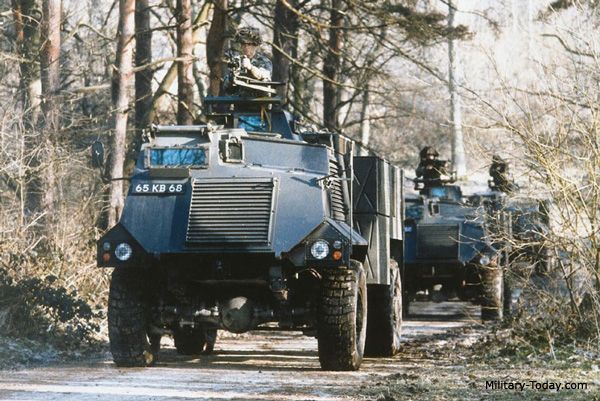
It was procured to provide the two regular BAOR reinforcement brigades with protected mobility for the road deployment from UK to Germany a job it did very well. It was never intended to chase tanks, be particularly agile in mountainous terrain or operate in very hot countries. A demonstration in what happens when you buy something that is fit for a purpose.
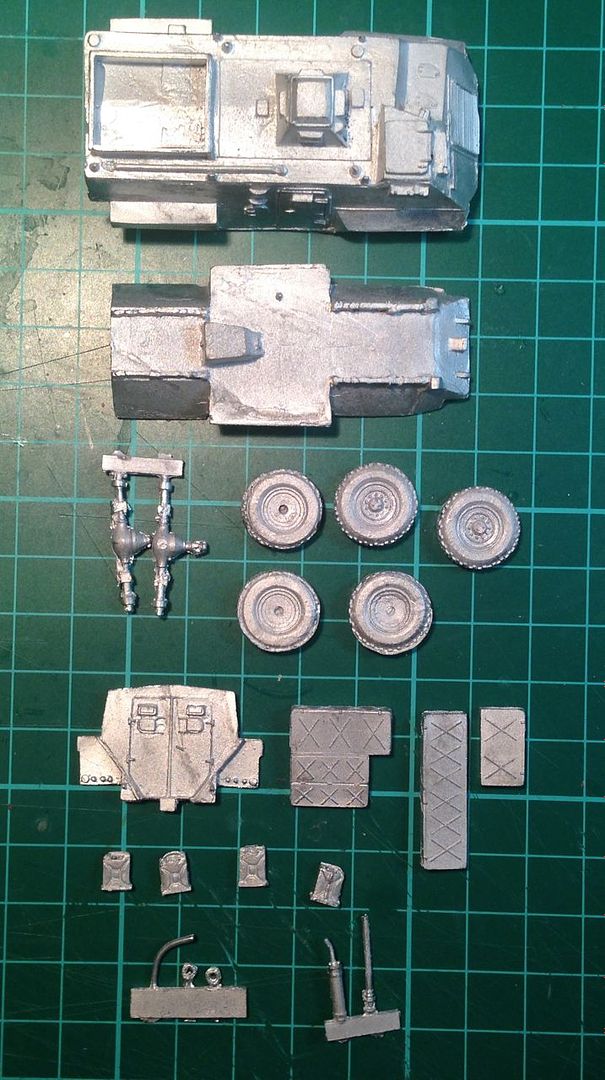
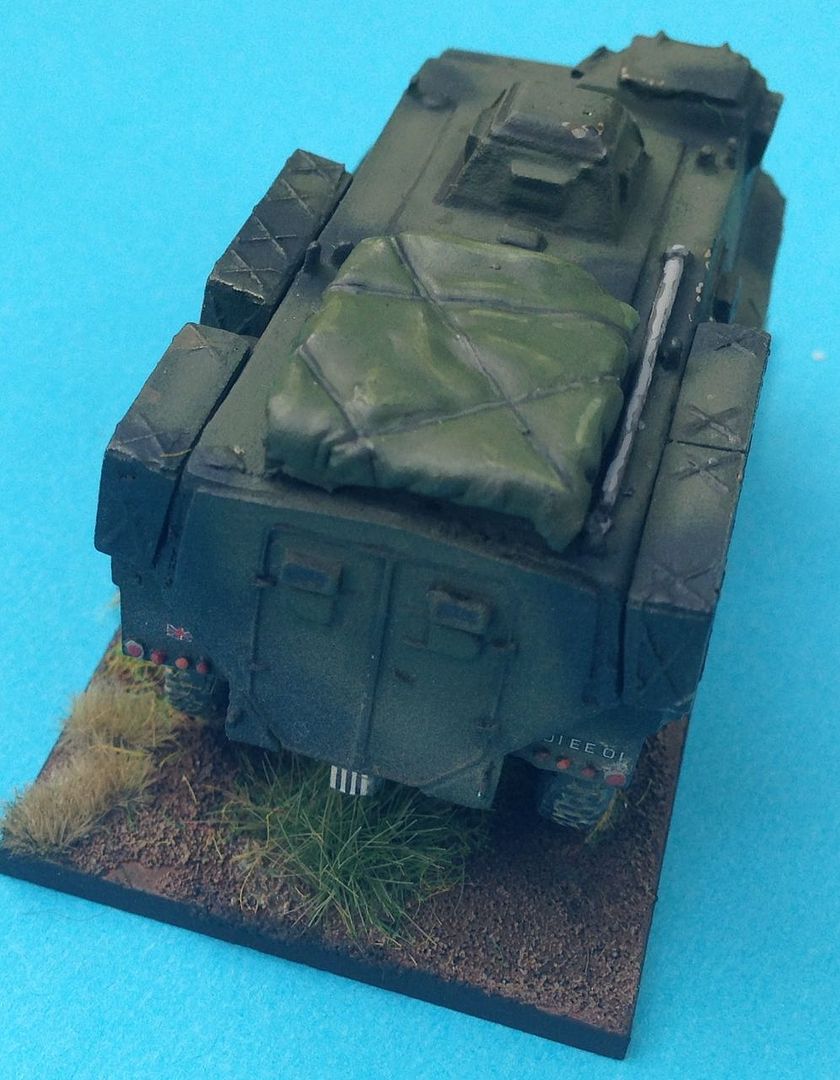
BW models who recently ceased production have recently sold a number of their masters and moulds to The Hobby Den and so should be back in production soon. The model is well cast in white metal and comes with a comprehensive instruction set. Fit of parts is very good for a metal kit and most of the filler activity is on the underside of the vehicle around the wheel arches although some work is also requiered around the rear of the vehicle. On my sample the rear suspension units were malformed but this was easily rectified using plasticard to jack up the rear suspension.

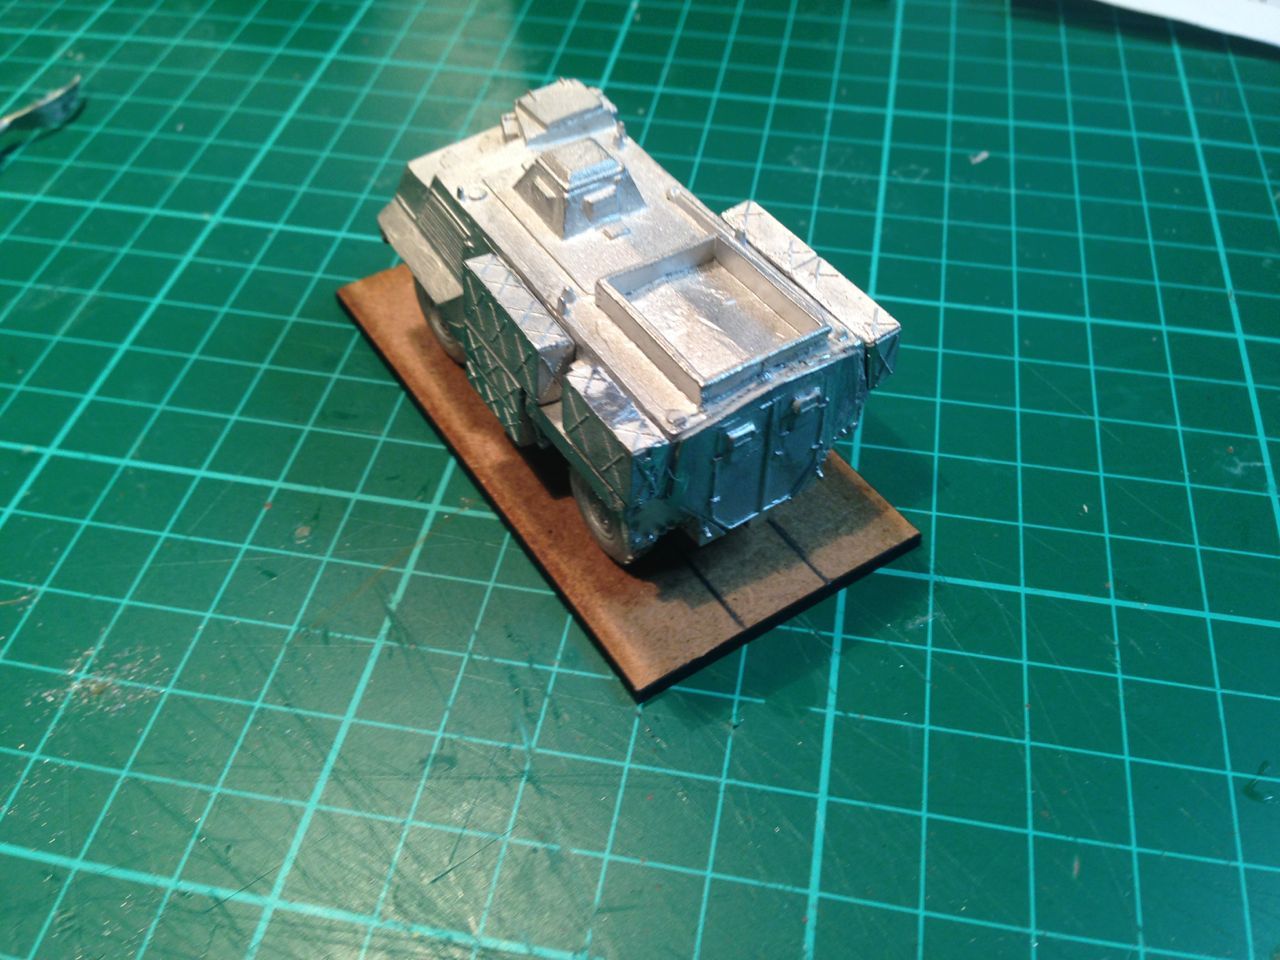
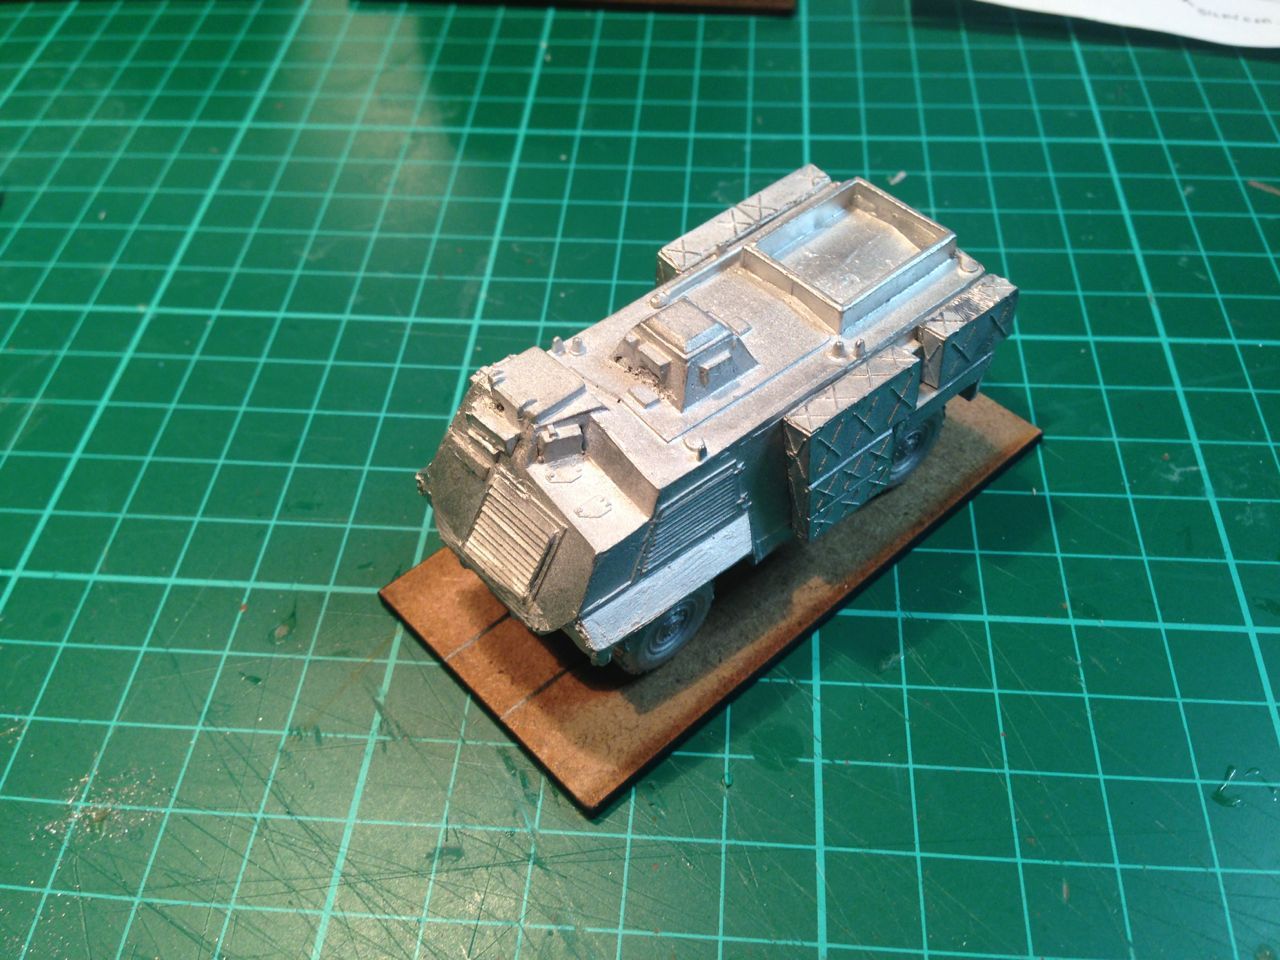
Two of the wheels needed drilling out but this was also very straight forward to fix. The kit was flash free and the level of detail and accuracy is very good. Given that the model is made in white metal it is excellent value for mony at £14, I was back on the site looking for more once I had finished the build. Assembly and build was easy with very limited filling. Whilst the axels look sturdy enough to support the vehicle I have decided to support mine with a pin connected to the base to prevent Axel sag which can be painfully on white metal vehicles.
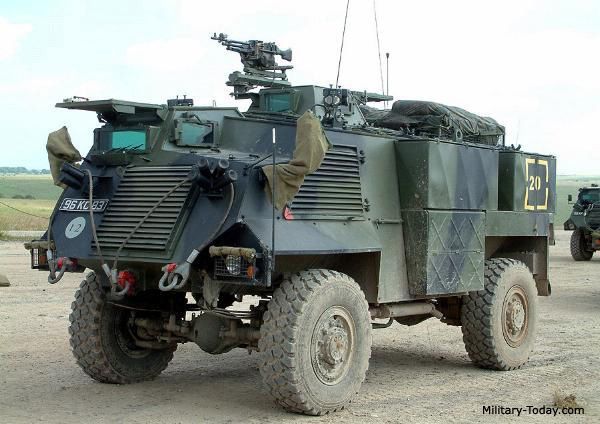
The kit does not come with MBSGDUs but judging from the Immagery there were a variety of fits and they probably came into service without these fitted. if you are after a vehicle for Kosova or later then I suspect the S&S peak turret would work, as I recall the Morter hatch cover complete with turret was fitted into the roof of the vehicle.
In immages of Saxon they are very lightly stowed primarily because they had massive stowage capacity within the side bins the top cargo rack and internally. I always considered them to be one of the most comfortable armoured vehicles I ever operated from, far less cramped than both Warrier and FV432.
I could find no reference images where the door mounted Jerry cans were mounted. Options for stowage include:
- A covered but slightly heaped cargo rack
- Bergens, Jerry Cans and Cam Nets uncovered in the Cargo rack
- Barbed wire dannet coils on the roof front or sides
- Hessian covers around the lights.
- A Cam net on the back deck
- A steel towing cable on the front of the vehicle.
- Antennas
- The forward right fender pole
- Air defence MG
- Commander
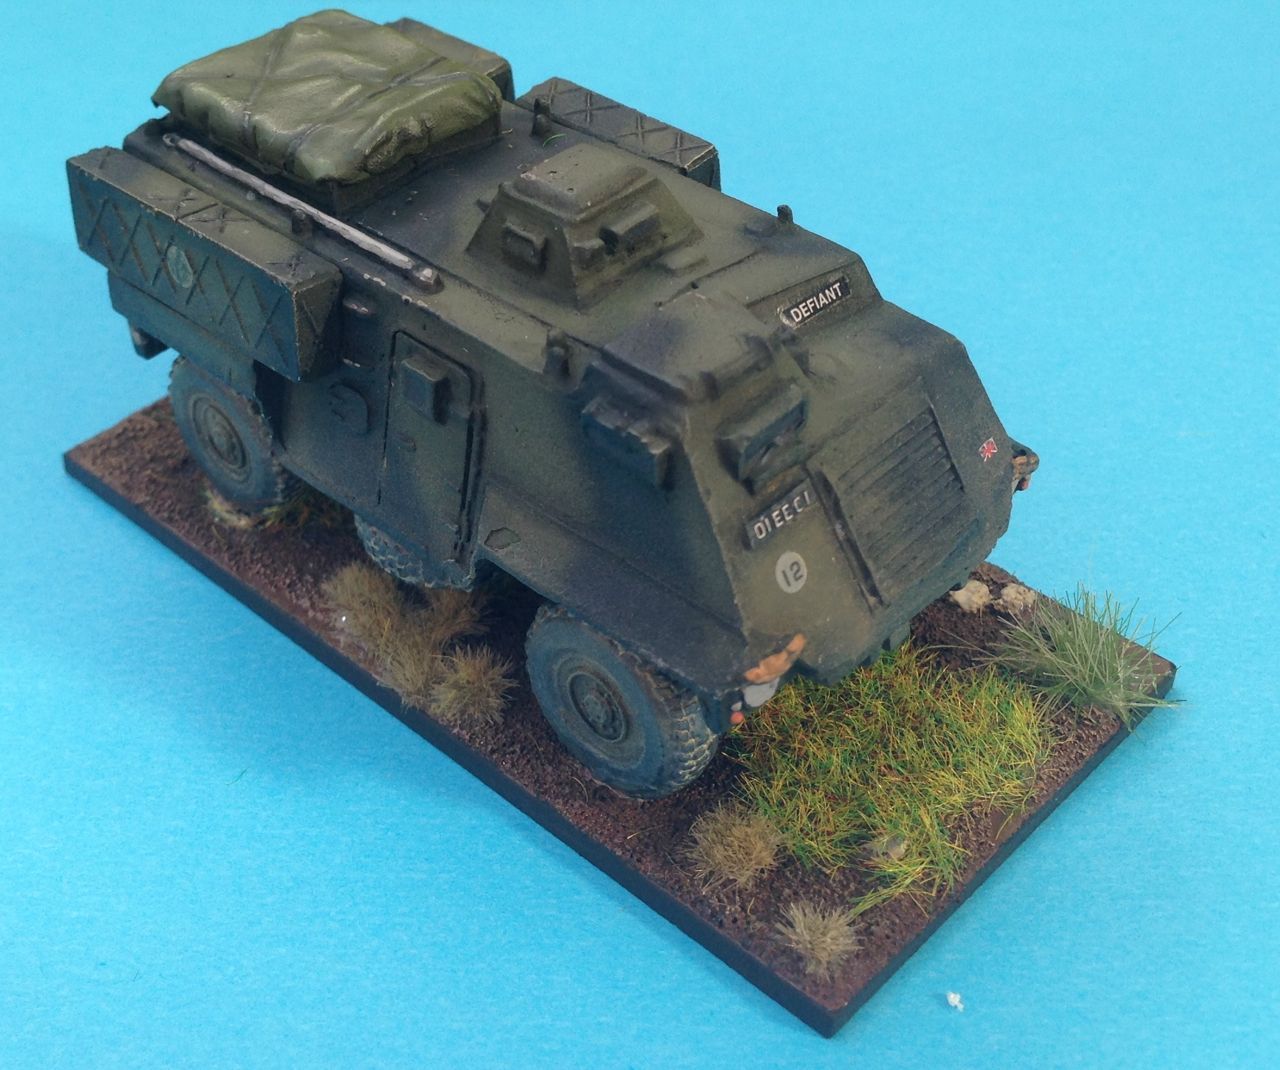
For this Wagon the covered stowage rack was created using green stuff marked with a wet knife. The hessian headlight covers, were produced using rolled green stuff similarly marked.

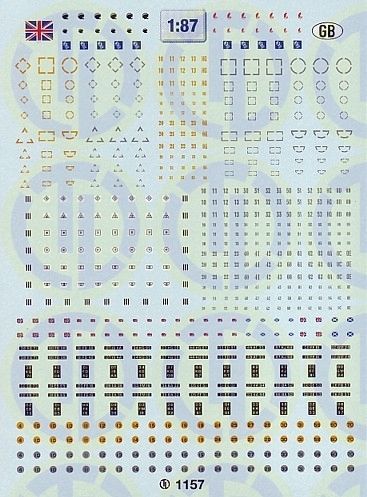
For markings the vehicles routinely carried the following:
- Call Signs in Yellow or Black. For the Infantry Wagons I will use Yellow and for the Air defence units I will use the same black as I have for the units Rapiers and M548s.
- The weight clasification symbol, which should read 12 Tons
- VRN
- National symbol
- Vehicle Names, policy would vary between units, some units followed naming conventions, I suspect that this was more prevelant post Cold War but do not know.
- Unit symbols were more prevalent post Cold War when the emphasis on unit anomninity started to decline.
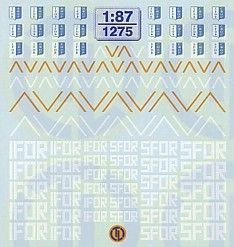
- Recognition Cheverons were a Gulf and Kosova feature but as with many other operational markings may have been used if the Cold War had gone Hot in the late 1980s. Along with other aspects of the immediate Cold War period such as air identification panels.

I used decals from the TL Modelblau set which are very useful but sadly only include a limited number of Call Signs at each size. The only problem with these sheets is the cost coupled with the need to use 2 or 3 sheets if you want to do a unit with Yellow sub unit indicators and call signs. Or indeed if your Wargames unit size is much larger than the 10+ vehicles that end up in a Rapid Fire representation of a unit.
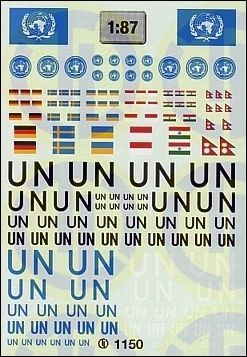
depending on wheher your a die in the wool Cold War Gammer or have slightly wider interests some of the other decal sets may also be of use.
- Olive Drab XF- 67 as the base colour
- This was oversparyed with 50:50 XF -67 and XF- 65 Field grey.
- Nato Black XF-69 was used for the disruptive pattern.
- Pin wash used a mix of GW Badab Black and Agrix Earth Shade.
- areas of the vehicle had filters applied that were dilute solutions of badab black and Seraphim Sepia.
- The Hessian Drapes over the headlights were Vallejo medium flesh.
- Reds, Yellows Oranges were all Tamiya paints, these were used for indicators, rear lights and reflectors.
- Vallejo Sky Grey was used for headlights, reversing lights and the tow bar. I seem to recall tow bars being painted, worn or bare metal and it provides a good contrast to the rest of the vehicle.
- Once painted and decaled the lower portions of the vehicle and wheels were weathered using a wash of Vallejo Kahki Grey then oversprayed with Tamiya XF-59 Desert Yellow were

All up an excellent kit that I wish I had found sooner as I would now have a completed Saxon Battalion. As it is I just managed to get an order in and another 7 arrived yesterday so the Saxon battalion project looks like it's game on, more posts to follow.
Whilst the vehicle is covered quite well by the usual web sources and a variety of pictures I could find no other model reviews or collections of walk around views other than on sites of people selling the vehicles equally I struggled to find any book references.
References:
Encyclopaedia of the Modern British Army
Warpaint, Colours and Markings of the British Army 1903-2003
Warpaint, Colours and Markings of the British Army 1903-2003
September 2014, The whole BW Range has now been purchased by The Hobby Den and it is hoped that many of these excellent models will be available again soon.
Cold War Gamer, a Post War Gaming Facebook information stream.
No comments:
Post a Comment